


How Glue can Affect Your Nails
Oct 24, 2020 21:49
When used correctly, nail glue is a great way to apply your acrylic nails for long-lasting adhesion.
Glue-on nails don’t have to be scary. When you take the right steps to clean and prep your nails and the proper steps to remove them, you can safely use nail glue to keep your beautiful acrylic nails on without much fuss.
If you are currently wearing a set of acrylic nails and are ready to change up your style, there are a few steps you can take to make sure you are keeping your nails healthy while still using beautiful and versatile glue on nails.
Steps to keeping your nails healthy while using glue on nails:
Step One
To remove your acrylic or glue on nails without harming your nail bed, the first thing to remember is to take things very, very slow.
Soak your nails in warm water before attempting to remove them. This softens up your natural nail and the acrylic nail as well as surrounding cuticles.
Step Two
Cut down your acrylic nails, so you have less surface area to work with and, hopefully, more access to the area between your natural nail and the acrylic.
Step Three
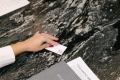
Place a cotton ball soaked in acetone over the top of the acrylic nail. This will soak through and start to break up and degrade the acrylic so it can easily be lifted from the nail.
Step Four
Use cuticle oil around the edges of the nail to help work the nail. Work the nail using a wooden cuticle pusher to wedge under the backside of the nail where it meets the cuticle. Gently rock the cuticle stick back and forth. Apply more cuticle oil to the lifted area to help lubricate and release the glue on the nail.
Use your cuticle stick to easily slide the acrylic nail right off your nail. Gently repeat these steps two through three until you have removed all the acrylics from each finger.
Step Five
Use a nail file to remove any remaining acrylic nail. Sometimes most of the nail will come off, but not always the whole nail. You can use a nail file to gently file away the excess. It should file exactly as your real nails do, so remember to file in one direction.
Step Six
Use a four-sided nail buffer to remove the final debris, smooth out the nail, and buff it up clean and shiny for the new acrylic to have a perfect surface to adhere to.
Step Seven
Wash your hands with a moisturizing soap to remove any excess cuticle oil or acetone from your hands. Be sure to give your fingernail and surrounding cuticles a good, soapy massage to remove any excess oil from the area.
Step Eight
Give your nails a break. Seriously, it’s okay to wait a few days and allow your natural nails some time to breathe before you go popping on more glue and more nails.
Step Nine
Now it’s time to put the new set of nails on. Grab your new nail and the nail glue, and using a disposable cuticle pusher, spread a drop of the glue no bigger than a small glass bead.
Step Ten
Slip your new acrylic nail over the tacky setting glue on your natural nail and press your acrylic nail directly onto the top of the natural nail with gentle pressure, holding for about 3 - 5 seconds.
And voila! You’ve successfully safely removed and replaced your acrylic nails at home.
In conclusion, the trick to safely remove glue on nails is to take things slow and be very patient with the nails' previous set of nails. This will ensure that you can enjoy switching out your acrylics whenever you are ready for a new style or color!