


Easy Furniture Refinishing Techniques – Tips and Guidelines
Apr 22, 2019 12:21
The nice finishing of your favorite wood furniture may get damaged after using them for a long time. Even the new furniture finish may be getting spoiled if some unexpected thing falls on them accidentally. But it's not mandatory that you always take them to furniture refinishing store for refinishing them. Rather you can learn the furniture refinishing techniques and apply them by yourself. In this article, we will discuss and let you know the furniture refinishing techniques that will help you to do this job at home.
Furniture refinishing techniques step by step
Clean the Furniture Properly
If you want to renew the furniture, your first step will be the cleaning. Properly remove all the grime and dirt restored on the original luster. You can even wash your furniture by using soap and water! It’s better if you mix dish soap with water and use it for cleaning.
You have to make the mixture in the same proportion as the same you do for washing dishes. In a similar way of dishwashing, take a sponge, dip it into the mixture and scrub the surface of the furniture gently with a wrung sponge. Scrub the full surface with soapy water and then use a dry sponge or towel to clear the water and dry it.
You can clean the moldings, joints, and carvings of the furniture by a paintbrush. You can use cordless sawzall for refinishing purpose and here is the best Cordless Sawzall Review.
Remove Paint Spatters
There is a paint spatter in old fashioned furniture, which is easily removable. You can try to remove the paints without damaging the furniture finish. Take a blade and wrap it with a masking tape layer at both of its ends.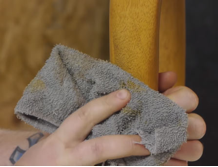
Now make the blade curved by bending it slightly. Remove the thin layer of paints with this curved blade. This curved blade is really a helpful tool in furniture refinishing that will allow you to do this paint removing task perfectly.
Fix Missing and Damaged Wood
There may be some sections where the wood is missing or damaged. You can fix the damaged molding or missing veneer by applying epoxy putty. Dealing with epoxy is quite interesting! You can blend it as per requirement and give it any shape and after applying on the damaged furniture it will be hard to find it out. It looks perfect because of its light color and almost similar density as wood.
Put on gloves in your hand and cut a slice of epoxy using a knife or any other cutting tool. Take the epoxy putty slice in your hand and blend it to a consistent color to make it sticky. Apply it in repairing within five to ten minutes, as it will start hardening after some time. The hardened epoxy is not applicable, so you should cut a slice according to your need and try to apply it quickly.
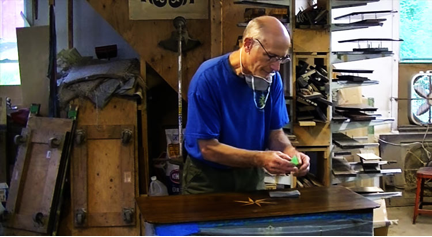
Perfectly Finish the Applied Epoxy
The epoxy will get dry and hardened within a few hours. Now start staining and sanding this repair. You can use sandpaper to fix depressors and apply normal wood glue or adhesive spray to attach these sandpapers. Make sure that there is no damage to the adjacent finish by these sanding.
Now you need to match this repair with its surrounding color. You can use thick gel stain for this task or some specific markers made for stain touch-up. It's better if you take two stain colors and mix them to get a range of colors that will match the dark and light areas of the furniture wood. Now start staining with a paintbrush and let it dry.
You should follow the instructions of the product’s manufacturers while applying the stain. It will be the easiest way to apply the stain with a staining pad instead of a paintbrush. First, apply a light stain coat and remove excess strain. Now put on another stain coat on the wood and let it dry. Repeat applying coats until the exact color is gained.
Remove all cracks
There may be some small cracks or tiny holes even after your final finish. Use fill pencils, colored wax repair sticks or fill sticks that are available at paint stores. You can simply rub these sticks over the defective area but you can also make thin wafers by your hands and fill the small cracks.
After filling the crack with a stick, take a soft cloth and buff that area. Sometimes it is seen a crack in the furniture hole made by a tiny hole cutter saw and that is why your hand is reachable there. Now should use a cloth wrap stick or like this anything you prefer to coat the crack.
Apply Clear Coat and Renew the Luster
The last but the most important step in furniture refinishing techniques is to apply a clear coat of finish. You have already finished the cleaning, repairing, sanding, and staining of your furniture. Now it's time to discover which type of coat of finish you will use to restore the luster of your furniture.
You have to consider the level of your refinishing skill and the protection capacity and the durability of the finish. It's also important how it is going to be used and what look it will give to your furniture. There are clear coat finish, wipe-on gel finish and sanding papers available in the market.
Clear coat finish is easily applicable than the sanding papers. Follow the natural lines of the wood to apply the clear coat and make a layer of it on the wood directly. Now sand the wood surface lightly and then apply the final coat layer. The final coat layer will take almost 24 hours to allow the wood to be ready for use.
If you want to use wipe-on-finish, first, you have to apply some coat on a clean rag. Apply the coat in rotating motion and wipe off the extra finish. Let the finish dry for overnight and it will be completely ready for use.
Conclusion
We have tried to mention the easiest furniture refinishing techniques step by step. You don’t need to be an experienced handyman for refinishing single damaged or old furniture. Just follow these easy tricks and get an unbelievable result! Your refinishing task will be almost similar to professionals and the furniture will get a fresh new look!