


Benefits of Fuel Cards for Efficient Fuel Management and Cost Savings


Effective Campaigns That Drive Fundraising Results

Effective Campaigns That Drive Fundraising Results Apr 21, 2025
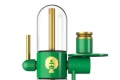
Stoner-Tested Tips for Picking a Gravity Bong That Lasts


Blurring the Lines: Bringing the Real Casino Experience to Online Players


Main Considerations To Select The Very Best Machine Vision Lens For You


Hernando County: The Next Stop in Florida's Commercial Real Estate Market Journey by Lawrence Todd Maxwell of MX Properties, Inc


Soaring Through Time: The Rise and Future of Aviator Games


Thrilling World of Casino Gaming: A Modern Entertainment Experience


The Importance of Employee Relations

The Importance of Employee Relations Dec 18, 2024

Why You Need a Brain Injury Lawyer in Toronto

Why You Need a Brain Injury Lawyer in Toronto Dec 04, 2024

Why Do You Need a Car Accident Lawyer in Toronto?

Why Do You Need a Car Accident Lawyer in Toronto? Dec 04, 2024

What Does a Personal Injury Lawyer in Toronto Do?

What Does a Personal Injury Lawyer in Toronto Do? Dec 04, 2024

Why You Need a Personal Injury Lawyer in Toronto

Why You Need a Personal Injury Lawyer in Toronto Dec 04, 2024

How Long After an Accident Can I File a Claim in Ontario?


Aluminum Pergolas: A Comprehensive Buyers Guide

Aluminum Pergolas: A Comprehensive Buyers Guide Nov 29, 2024
How to Replace a Toilet Fill Valve
Aug 01, 2020 10:32

When having a damaged toilet fill valve, you will certainly need to fix it the right way. If not, then expect toilet malfunction throughout your day. But here's good news: you can replace and repair your toilet fill valve with your own hands. However, you need some parts, tools, and effort to make that happen.
Read this article and discover how to fix things like this at your own home.
Indicating The Need To Replace Toilet Fill Valve
Typically, you should replace your toilet fill valve in its fifth year. If you don't do this, it will begin wearing out, and you'll probably experience some of the things below:
● Continuous running of water
● Screeching sounds
● Toilet does not flush or completely flush
But you do not need to worry. Replacing your toilet fill valve is an easy procedure. Just follow the steps below, and you will feel accomplished and relieved after doing so.
Phase 1 - Removing Your Existing Toilet Fill Valve
Follow these steps when removing your existing fill valve.
Step 1: Turn Off Your Water Supply
Before doing anything else, you must first turn off the water flow outside your toilet. There must be a direct water valve below your toilet tank. More so, you can locate this between the water pipes coming out of your wall and the bottom of your toilet tank where this is attached.
Most cases require turning your water valve clockwise to shut it off. Make sure to do it continuously until the valve stops from moving.
Extra Tip:
Experts share this excellent idea - turn off your main water supply as well. You may check your main water supply valve outside your house and shit it off. After that, check your other fixtures to ensure this is really shut-off. There may be residual water from the system. But in light of this, you can prevent water damage caused by flooding in your area.
Step 2: Drain Your Toilet Tank
Once you are sure the water supply is off, you must drain your toilet tank before disconnecting the toilet fill valve.
When draining the toilet tank, you need to flush your toilet. Then, hold it's lever down so you can remove all the water stocked there.
After that, when you see the water is drained, you have to use a wet-dry vacuum to remove small amounts of water residing at the bottom of the toilet tank.
When you have no wet-dry vacuum, use a sponge or an old towel to absorb the remaining water or sediments in the toilet tank.
Step 3: Locate Your Toilet Fill Valve
At this time, you have to remove your tank lid. Then, carefully place it on a cloth or towel away from you to avoid being broken. You will see the toilet fill valve inside your toilet tank. That is usually found on one side.
For newer toilets, this is the whole column, including float, with an on-off level made for filling.
For older ones, the float comes separately but gets connected to the upper fill valve.
You will also see that this fill valve has tube attachments connecting to an overflow pipe.
Step 4: Detach Your Toilet Fill Valve.
You have to loosen the nut, which secures your fill valve through the waterline. Turn it counterclockwise with a wrench or players.
Then, you must carefully pull the water supply line out of the valve below the toilet tank.
While you are unscrewing the nut, bits of water may drip out this tank. So, keep an old cloth or towel on the floor below the toilet tank opening for catching dripping water.
Phase 2: Installing Your New Toilet Fill Valve
Check this guide for installing a new fill valve.
Step 1: Get The New Fill Valve
Visit your local or online store to buy a new toilet fill valve. Most of these are universal. So they fit almost all toilet designs. On the other hand, when you have second thoughts about the fit, bring your old toilet valve as you purchase or use it when assessing your possible replacement valve to ensure it works.
Remember that your old fill valve had its separate float, a new valve with float integration on the shaft works.
Step 2: Set The New Toilet Fill Valve On Its Place
Remove your new fill valve from the packaging. Make sure to read its manual before doing further steps. The toilet fill valve must be fully assembled. This helps you to set it straight into your toilet.
Moreover, you must remember to clip the new refill tube through the overflow tube.
Step 3: Place The Washers On The Right Spot
It's vital to give attention to how your washers and nuts attach to your valve. There must be washers both on the inside and outside of the toilet tank. This is where the fill valve takes through.
These washers ensure that water is tightly sealed around every connection point.
Step 4: Carefully Tighten The Toilet Fill Valve Nut
As you have set the fill valve, the last installation step requires you to tighten the lock nut through the threaded portion of its valve. You can locate this underside in your toilet tank.
When you do this, never tighten its nut too hard. Use your hand on this to make sure you do it right.
Reminder: Using pliers or a wrench for tightening the valve may crack it or the tank.
Step 5: Reattach Your Water Supply
Turn on your water line the moment you finished replacing the toilet fill valve. Make sure your washer is tightened correctly.
Do not over tighten washer for the nuts may crack, leading to leaks. When there is a leak, turn off the water supply immediately.
Extra Tip:
Be careful when turning the water back in. When your valve is on, turn on the main water supply slowly. Have someone check the toilet and check and ensure there is no leak when regenerating your water system.
Step 6: Adjust Your Toilet Float
As the water gets back on, your toilet tank is filled, and you may adjust its float on your new fill valve. The location of the float is adjustable with its side clip. You may also adjust it with a screw at the fill valve's top or float shaft where they are attached.
You must do the steps correctly. Your goal is to make the float come up and shut off the water before getting high enough to overflow.
Final Words
That's it. Scroll through this one, and you can now start replacing your toilet fill valve whenever you find it necessary.

Fuel cards offer numerous benefits for fuel management, including cost savings through exclusive discounts, real-time tracking of transactions to monitor spending, convenience with access to a wide network of gas stations, and improved cash flow by eliminating employees' need to use personal credit cards. Additionally, fleet fuel cards provide features such as spending limits and detailed transaction transparency that enhance accountability and streamline financial processes. Read more
LIFESTYLE
May 03, 2025 08:45

Nonprofit organizations spend countless hours appealing to donors and expressing gratitude for their contributions. The time spent often doesn't provide the desired results, and they feel they are spinning their wheels. They need effective campaigns that drive results. Read more
LIFESTYLE
Apr 21, 2025 15:38
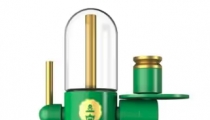
Gravity bongs have built a solid reputation in the smoking community, offering a unique way to enjoy cannabis. Their appeal comes from the smooth hits and the interesting method of using water pressure to pull smoke. It’s a setup that draws in both long-time users and curious first-timers. The strong pulls and water filtration are key perks, and with all the different styles and materials out there, there’s something for everyone. Read more
LIFESTYLE
Gravity bongs
Apr 15, 2025 08:33
Copyright © Fooyoh.com. All rights reserved. User Agreement | Privacy Policy | Contact us
| Advertising
| About us
| Careers