


How Do I Keep My RV's Paint from Fading?
Apr 19, 2023 11:47
Your RV’s exterior paint is one of the most vulnerable parts of your rig when it comes to the elements. Over time, UV rays will damage and fade your RV’s paint, making it look dull and unattractive.
The good news is that you can do a few things to keep your RV’s paint looking bright and shiny again. According to Bob Moses Ceramic Coating, these tips will help you preserve your RV’s paint for years to come!
Sun Damage
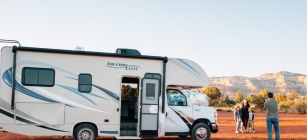
Sunlight can cause many problems for your RV, from drying the tires to fading the paint. Not only does this make your RV look bad, but it can also affect its resale value.
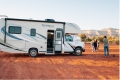
Keeping your RV protected from the sun is one of the most important things you can do to ensure it continues to look its best. This can help you avoid the need for costly repairs in the future and keep your RV looking brand new for years to come!
In addition to affecting the exterior paint of your RV, sun damage can also affect the interior. Luckily, there are a few simple ways that you can protect your RV from the sun's harmful rays.
Covering your RV with a heavy-duty cover can be a great way to keep the sun away from it while still leaving it exposed for use. This will also keep UV rays from damaging your RV's upholstery and fabrics.
Another good way to prevent sun damage is to regularly wash your RV's exterior. This will help remove the dirt and grime constantly building up. This will also allow you to spot potential issues before they become major problems.
Adding a layer of wax to the surface of your RV's paint can also help to prevent sun damage. Waxing will give your paint a shiny, new appearance and will help to repel water and dirt. However, choosing a wax that is safe for your RV's material is important. Some waxes will damage fiberglass, so be sure to research your options before purchasing.
Finally, sun blockers for your RV's windows can also help keep the sun from entering your RV. These are a great investment to protect your RV from the sun's harmful UV rays and will help you to maintain your RV's resale value.
In addition to fading your paint, sun exposure can cause blistering and bubbles in the paint as well. These are particularly common in colors that have red or purple in them, but they can happen with any color.
Water Damage
If you're planning on leaving your RV parked outside, it's important to know how water damage can affect the paint. The first step is to check the seals around your RV, including the roof and ceiling. If you notice any leaks, you should fix them right away to prevent water damage.
You'll also want to protect your RV from UV rays, which can cause thermal checking in fiberglass. These spots can look like puffy, wavy, or dented areas that will need recoating or repainting.
Another way to keep your RV's paint from fading is to avoid excessive time in the sun. You can minimize your RV's exposure by parking in the shade when possible and storing it under form-fitting tarps between road trips.
In addition to causing the paint to fade, sunlight can damage the exterior of your RV, affecting everything from your interior to your wheels and tires. It can also cause rust, corrosion, or dry rot, which can ruin the exterior of your RV.
Despite their high-quality build, RVs are still susceptible to moisture damage. This is due to the nature of their design and constant movement. Over time, these movements can break down the seals that help prevent moisture from entering your RV's interior.
The most common places where water leaks into your RV are the ceiling, floor, and walls. These spots can become warped or stained, resulting in water-related problems such as mold growth and mildew.
You can spot this type of water damage by inspecting your floors and walls for any soft spots or spots that feel spongy. Use your feet to examine the floors and press on the walls and windows.
If you see signs of a water leak, such as soft spots and stains, make sure to get your RV to a professional for inspection and repair. This will help to avoid future issues and potential health risks caused by black mold.
If you're unsure where the damage is coming from, take pictures of the affected areas and note any signs of mildew, mold, or fungus that appear in those spots. Then, when it comes time to make repairs, you'll be able to pinpoint the specific spot where the water came from and where it is likely to spread.
Road Detergents
A lot of road detergents out there are formulated to help you remove dirt, grime, and other gunk from your RV's paint. While these products may be effective at getting rid of dirt, they can also be damaging to your vehicle's finish if you use them too often.
Detergents work by reducing the surface tension of water. This allows them to mix hydrophobic compounds (like oil and grease) with water. They can also act as a foaming agent.
Using a detergent that contains petroleum distillates can cause your RV's paint to fade over time. Adding protection to your RV's paint after every wash will help prevent this from happening.
The best detergents for your RV's paint have a low pH and are free of phosphates. They are safe to use on the painted surfaces of your RV and can be used in automatic car washing machines as well as hand washing.
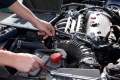
If you're a trucker or a fleet maintenance specialist, you know the value of heavy-duty truck detergents. These detergents can eliminate diesel smoke stains, grease residue, and road film. They can also be used to clean parts and engines.
When you're looking for a heavy-duty truck cleaner, look no further than Tommy Presoak solution. This versatile alkaline detergent is perfect for pre-spray cleaning engines, whitewall tires, and metal tops. It creates a moderate-high foam with a mild citrus scent and is readily biodegradable.
In addition, this detergent helps remove tar from your RV's windshield. It can also be used to remove rust stains from the body of your RV, making it a great product for anyone who travels in their vehicle.
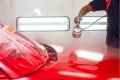
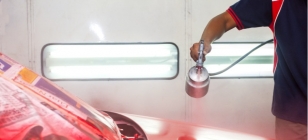
One of the easiest ways to keep your RV's paint from fading is to apply a coat of wax after each trip. Choosing a wax that won't strip your paint off or leave a shine that’s shinier than you want is important.
A good RV wax should be made specifically for the painted exterior of your vehicle and have a non-scratch formula. Some of the RV waxes on the market have abrasive compounds that could scratch your paint.
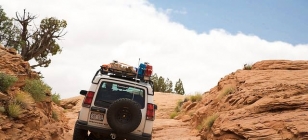
Tires
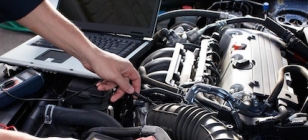
Tires are rubber ring-shaped structures that carry your RV from one place to another. If you've ever gotten stranded because your RV's tires have worn down and aren't doing their job, you know how important it is to keep them in good condition.
If you're unsure of what to look for on your RV's tires, you can do a few things to make sure they last as long as possible and are safe to use. These include inspecting the tire tread depth and re-aligning your RV's tires every few years to lengthen their life.
Keeping your RV's tires in good condition will not only help them last longer, but it also protects the paint on your RV and makes it more attractive to potential buyers. Regularly checking your tires for uneven wear or cracks will give you an idea of when it's time to replace them.
The components of a typical tire diagram:
A rubber-based tire has many different parts that work together to provide strength and resistance to abrasion. The first layer is called the carcass, made of a mixture of synthetic and natural rubber. The next layer is the tread, which is a rubber compound that creates contact with the road to provide traction and turn grip.
Tread rubber is also abrasion resistant and helps reduce wear by absorbing road friction. Anti-aging chemicals are often added to improve the longevity of the tread and reduce sidewall cracking due to UV radiation and ozone.
Other components of a tire are the beads, bead filler, and inner liner. These three parts hold air within the tire walls and are designed to prevent overheating and maintain the shape of the tire when you drive fast.
To keep your RV's tires in top condition, check the DOT age code on the sidewalls to determine when the tires were made. The last four digits will tell you when the tires were made, and the week of the year they were manufactured.
Using the right tire inflation pressure for your vehicle's load will ensure you get the most out of your tires and help prevent uneven wear. Be sure to check your RV's manufacturer-recommended inflation pressure before you leave the house, and remember that under-inflated tires will make it difficult to control your RV.