


How to Powerslide on a Longboard
Sep 10, 2021 23:59
Powersliding on your longboard is one of the most exciting and important moves. Powersliding was a goal of mine from the beginning, even though it seemed scary at first.
How important is it to know how to powerlide? It's not only cool but it's also a great technique to slow down and stop on your longboard. Powersliding is a key component of downhill and freeride longboarding. It's extremely useful for commuting or cruising through traffic.
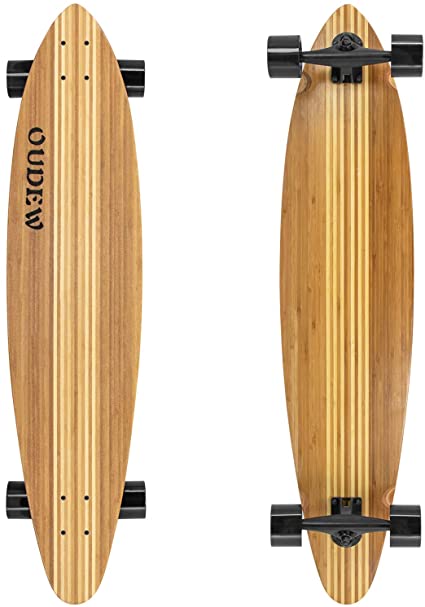
Powersliding is when you push your board 90° across the road, so that your wheels stop spinning and your wheels start skidding. You lose speed quickly due to friction, making it an effective way of slowing down or stopping. Check out the best electric longboard
These are the steps to follow when you learn how to do a heelside standup powerslide:
• Begin by learning a little speed on flat terrain or on a small slope
• Press on your front rail to make a slight pre-turn at the toe.
• Next, take a sharp heelide turn and keep your weight low.
• To turn your board 90o, push your back foot out from the side.
• During this time, extend your legs straightening, swing your shoulders and leaning backward.
• Stop the slide by releasing the pressure from your backfoot and lowering your weight to the front.
Powersliding can seem intimidating at first, especially if you aren't a confident teenager/ twenty-something or a long-time snowboarder. It's an extremely technical move, but you can learn it in a safe and progressive manner.
Let's dive deeper into the power slide technique.
Types and uses of powerslides
There are many types of powerslides, including:
• Heelside slides (facing downhill)
• Toeside slides (facing upwards)
• Slides that you can stand on (don't fall while sliding).
• 180 slides (end of slide in switch stance).
• Coleman / glove down slides (put one to two hands on the ground).
• Pendulum slides (hands on the ground, swing board around your hands while sliding).
• Slides for sitting down (crouching low on the board)
• Speed checks (partial slide to slow down)
There are many other options.
These aren't clearcut techniques. Most powerslides combine several of them. Toeside Coleman slides are done by sliding uphill while keeping your hand on the ground.
Some powerlides are easier than others. Toeside slides, on the other hand, are easier to master than heelside. You're looking forward (downhill), and pushing your heels (vs. your toes).
Sitdown slides are easier for some riders to learn because you're crouching low and stable on your longboard. This makes it less intimidating. For older riders, I find stand-up slides easier to learn.
People find 180 slides more difficult to learn than simple slides. They involve shoulder and hip rotations, and end up in switch (reverse) position - rather than returning to your original position after the slide.
It's a debateable point, but for me, it is easier to start with a non-180 slide. We will be focusing on the basic heelside stand-up powerslide in the remainder of this post. We'll see that the technique can be used for other types of slides.
Slide terrain
You can start by starting on a flat area with a path that leads to a hill. Start about 15 feet uphill, and then push into the hill. Be prepared to slide once you reach the flat area.
It is also easier to slide on wet ground because your wheels will lose traction more quickly as you push your board along. Longboarders who have experience recommend learning on wet pavement because you can slide faster. However, it is possible for your bearings to be damaged by wet surfaces.
Powerslide : first get some speed
Let's take a look at what you need to do before you start sliding. You'll need to have some speed. Sliding is easier if you have more speed. Your wheels will also break out and lose traction faster. Continue reading for more information about wheel choice.
It's a good idea to start on a steep enough hill. You'll be able to slide faster if it's wet.
Powerslide : toeside pre-carve
Press your toes while you are starting to get speed. Then, lean forward and press your toes with your feet to initiate a quick turn to the toe. To break traction on the next turn, a good pre-carve will be crucial.
A toeside turn is for regular footers. This means that you are moving towards the right side of traffic - the left side if your goofy.
Do the pre-carve turning while you wait. Now, start setting up your slide. Place your feet about equal distance from the trucks and symmetrically position your feet at an angle. Your slide will be more stable if your feet are closer together.
Keep your spine relaxed and your knees bent. This will help keep your center low.
Powerslide : heelside carve
You can turn once you are close to the road and begin carving into the slide. To initiate a quick 45o turn backside, press with your heel. 45o is the best way to go before you try to slide.
For leverage, place your heels slightly above the board's edge and bend your knees to lower your board. Because sliding involves a compression-decompression move, it is crucial to lower your center gravity. You crouch down (compress) just before the slide and then you pop up (decompress).
The actual slide
Now you are ready to take your board out of the heelside and get into the heelside carving. Once you have turned your heelside from 15 to 30, you can do multiple things simultaneously.
• Place your weight on your front knee.
• To kick the back truck forward, place your heel on the rail. Then extend your back leg.
• Swing your hips back to assist with pushing and turning.
• To help the board lose traction, lift your arms and lean back.
• Keep pushing your board forward with both feet into the hill.
Your front knee should be slightly bent to control the situation, while your back leg should be extended. However, both legs should be pointing towards the hill and pushing away.
Keep your board in a slide position for as long and as possible while it skids. Your board is perpendicular towards the hill. Your arms are raised, your heels are slightly above the rail. Press hard against the rail to prevent the wheels from catching.
To keep your weight off the board, you should lean back. This will allow your body to balance with your torso. Do not lean forward as you'll stop pushing and your wheels won't catch. Use your torso to balance your body back and forth.
Ending of the slide
After sliding down the hill facing forward for a few seconds, you can return to your normal riding position and start again.
Keep in mind that you are still moving along the road. You're pushing your weight uphill and keeping your legs straight.
Now bend your knees and shift your weight into your front foot.
You will sink your weight into the board by pulling your back foot in. As your board begins to roll again, your torso will return to its original position. Your elbows should be brought back to your sides.
The following 33 seconds video provides a great overview of the powerslide. Although the rider is performing a 180 slide except for the end switch, the technique is very similar to a stand-up slide.
Common mistakes and tips
Are you having trouble learning how to power slide on your longboard? These are some common mistakes:
Is your front truck merely pivoting, with your back wheels pointing off the ground? Or are you actually sliding down the board? Do not overload the front of your board with too much weight.
Do you do a great heelside turn before you kick out? Are you kicking your board straight out of the gate with your back foot?
Do you put your weight on your front foot when sliding? You won't be capable of sliding if your weight is on the back foot.
Are you able to slide once you have kicked off? Are you too far forward, causing your wheels and tracks to catch? It is difficult to lean back because it requires trust, commitment and dedication. To avoid falling backwards, do not forget to lean forward at each end of the slide.
Advanced: Do you have flatspots? I.e. Repeated sliding at 90o can cause flat areas on your wheels. These flat areas can be avoided by learning basic sliding. You will also make your wheels last longer.